Saturday, September 29, 2012

Kindergarten Grant


PROJECT-BASED LEARNING 
AT ITS BEST!!!!!
The KINDERGARTNERS are writing a grant!!!!!!!!

We have 4 classes (3 kindergarten and 1 transitional kindergarten classrooms) that will be involved in the entire process of our grant.

We will be blogging our entire journey of this amazing process.
So keep coming back for updates!!!!!!

We realized our kindergarten playground needed a major overhaul when a group of students were creating a giant bird nest out of wood chips during recess. The kids spent an entire week building, constructing and having conversations about this bird nest.
"It needs to be big because an eagle is big." --Makena
"We need to add other things like yarn because I have seen that in a bird nest."--Hunter
"What if a bird lays eggs in it?" --Hayden


After watching these students converse and discover completely on their own, we thought of a GREAT PBL unit to incorporate into our kindergarten classrooms:

HOW DO WE CREATE AN
 OUTDOOR CLASSROOM?

Our goal: to write a grant to various places and create an outdoor classroom for our students.

Step 1: Have a conversation with the kinders about the indoor classroom and what we would need to create an outdoor class. We will RESEARCH outdoor spaces, playgrounds and classrooms.

Step 2: Brainstorm ideas (observe the outdoor area; draw and write ideas and come back and share as  a class). Each classroom has it's own theme: Rangers, Safari Guides, Cowpokes, Explorers.


Step 3: What is an architect? A person who designs and creates buildings and spaces.
Measure the playground/outdoor space using various object. How much space do we have? What can and cannot fit?

Step 4: Allow the students to become architects and draw up a blueprint of ideas.

Step 5: Present the ideas

Step 6: Collaboration: Combine ideas and work in teams to create a large model (we will do this in various ways: PIXIE projects, drawings, paintings)

Step 7: Present the models (vote on ideas)


Step 8: Fundraiser: We had an "Apple Stand" during recess and after school and sold a cup of sugar-free apple juice for 25 cents. We raised over $120.00!!!


First we spent 2 days making posters.
Students were in charge of creating the posters.


Next, we had an Apple Stand Fundraiser for 3 days.


We plan to invite MISSION FEDERAL CREDIT UNION to come in and talk about $ and savings. This is a great way to involve the COMMUNITY.

Step 8: Present our grant to The SANTEE FOUNDATION and LOWES.

On October 22, the kinders presented the grant to the
Santee School District Foundation.
Look at how adorable they are!


Brain Breaks

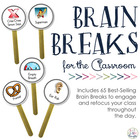
I purchased this BRAIN BREAKS pack on TPT and my kids love using them.

Brain Breaks for the Classroom

During every transition, I put on a fun movement song from my YOUTUBE videos and choose a popsicle stick with a brain break.

Sunday, September 23, 2012

Shapes

We begin studying shapes in September as part of our Geometry unit in math.
First we learn about 2D shapes.


Shape Cracker Graph 
While learning about shapes, we also explored "food" shapes in our world. We brought in various crackers and sorted, graphed and ate our favorite shape crackers.


We also created a PBL bulletin board.
We asked kids, "Where can we find shapes?"
Kindergartners were encouraged to bring in objects from home to share.


Shape Cookie Monsters
First, we watch these adorable Cookie Monster Youtube videos about cookie shapes.


Next, we made our tray of shape cookies (just foil and paper).
Then we created our own shape cookie monsters. 
They all turned out so unique and cute!
This is the poem I made up to go on the back of our cookie monsters.


After  learning about 2D shapes, we begin 3D (solid figures)


Spooky Haunted House (2011)
My favorite shape activity is our 3D haunted house made completely out of solid and recycled figures from home. After learning about cones, cylinders, spheres, cubes and rectangular prisms, we create a spooky haunted house. We created a spooky haunted house using household, recyclable objects. To make this project more meaningful, students brought their own items in from home.


Step 1: We found cylinders, spheres, cubes, rectangular prisms


                                     Step 2: Allow students to glue the objects on the board


Step 3: Paint it black


                 Step 4: Add cobwebs and spooky objects (we added lights and cheap Halloween trinkets)


Follow-up activity: 
We made a class book called "Our Spooky Haunted House".
A _____________ lives in my spooky haunted house.  

We have mini-october conferences, so this was a fun way for parents to see our first project displayed.
Students were able to point to the objects and name the shapes. 

                    This is the start of our 
haunted house for this year! (2012)
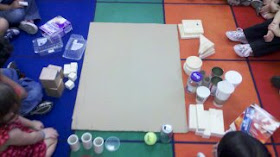
We collected objects.

We brainstormed how we can build it.

This is it! the kids decided on every single placement!!!
They are so creative!!!!


Let the BLACK painting begin!


WOW! Look how great it looks all black!


Next, we started adding spooky items to our haunted house
(we got most of the items form the Dollar Store).


Last, add cobs webs!


We put some skeleton lights on it (from the dollar bin at Target)
and glow sticks.


The final assessment:
Bring kids back one at a time and see if they can name the shapes and/or point to the objects
(cylinder, sphere, cube, cone, rectangular prism)


These are some really fun Youtube videos all about shapes.
We listened to the everyday during this unit.